

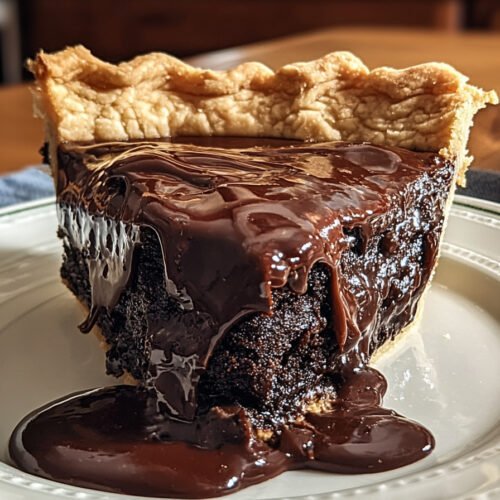
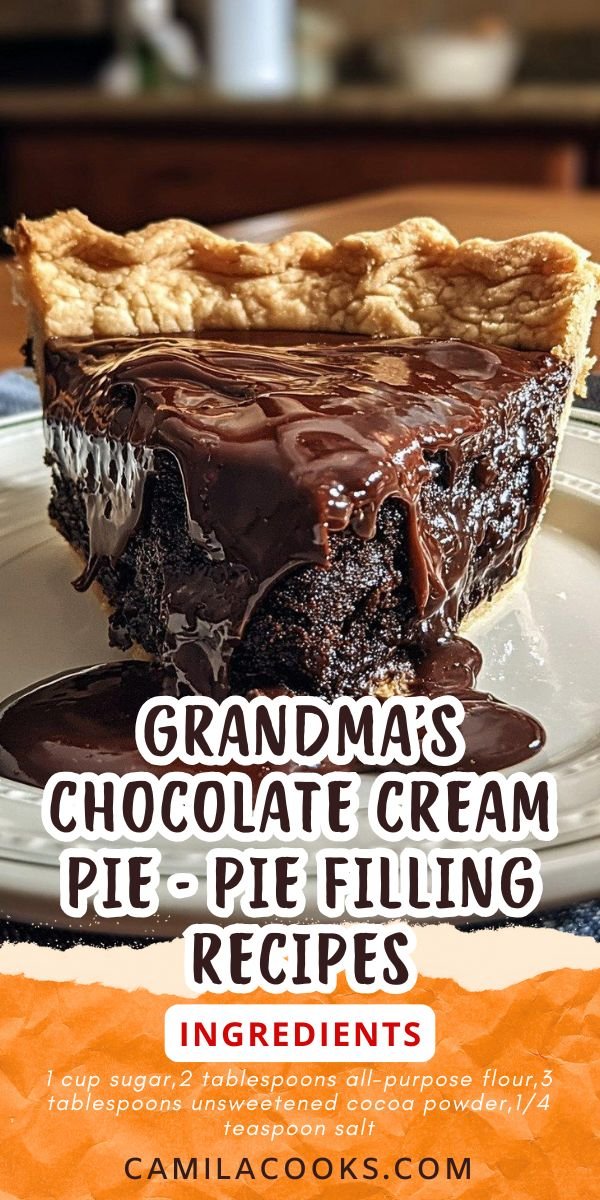
When I was a kid, there was a rule in our house: if Grandma brought her chocolate pie, you cleared your schedule. This wasn’t just any pie. It had this rich, silky chocolate filling that made you close your eyes and forget your name for a second. The kind of pie you sneak a second slice of and pretend it’s your first. I still remember standing by the stove, watching her whisk the cocoa, sugar, and eggs like it was some kind of sacred ceremony. No shortcuts, no boxed pudding nonsense—just good ingredients, real effort, and a whole lot of love. We’d let it chill just long enough to test our willpower, then slice into it with giddy anticipation. Now, I make it for my own family, and every time I take that first bite, I’m back in Grandma’s tiny yellow kitchen, feet dangling off a stool, waiting for my turn to lick the spoon. If you’re on the hunt for pie filling recipes that feel like a hug from the past, this old fashion chocolate pie recipe is where to start.
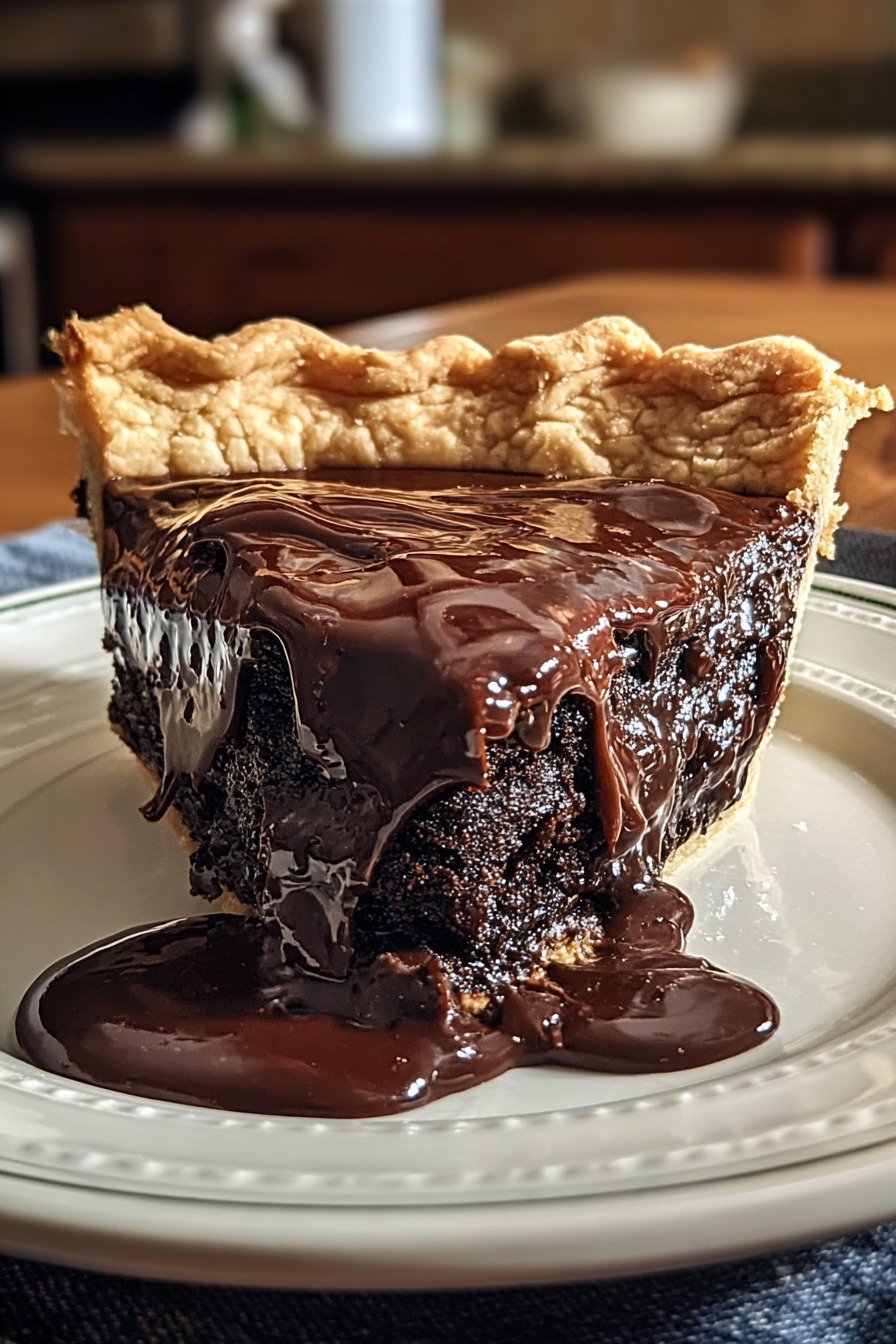
Table of Contents
- 1) Key Takeaways
- 2) Easy Grandma’s Chocolate Cream Pie Recipe
- 3) Ingredients for Grandma’s Chocolate Cream Pie
- 4) How to Make Grandma’s Chocolate Cream Pie
- 5) Tips for Making Grandma’s Chocolate Cream Pie
- 6) Making Grandma’s Chocolate Cream Pie Ahead of Time
- 7) Storing Leftover Chocolate Cream Pie
- 8) Try these desserts next!
- 9) Grandma’s Chocolate Cream Pie
- 10) Nutrition
1) Key Takeaways
- This recipe creates a silky, rich pie filling that tastes like nostalgia.
- It’s easy enough for a beginner, yet impressive enough for family gatherings.
- Made from pantry staples—sugar, cocoa, milk, and eggs—it’s comfort in a crust.
- Perfect for holidays, Sunday dinners, or just when you need a chocolate hug.
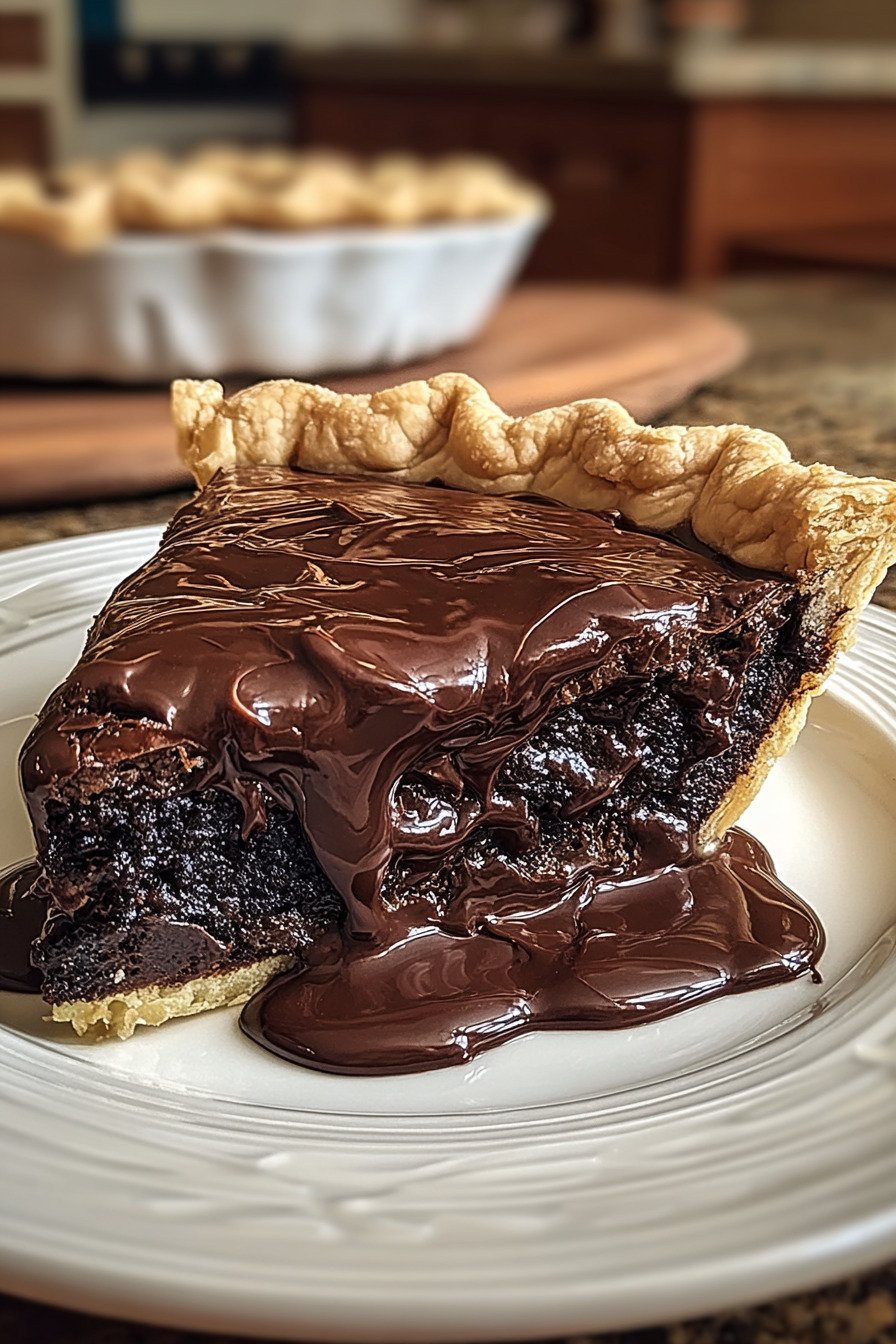
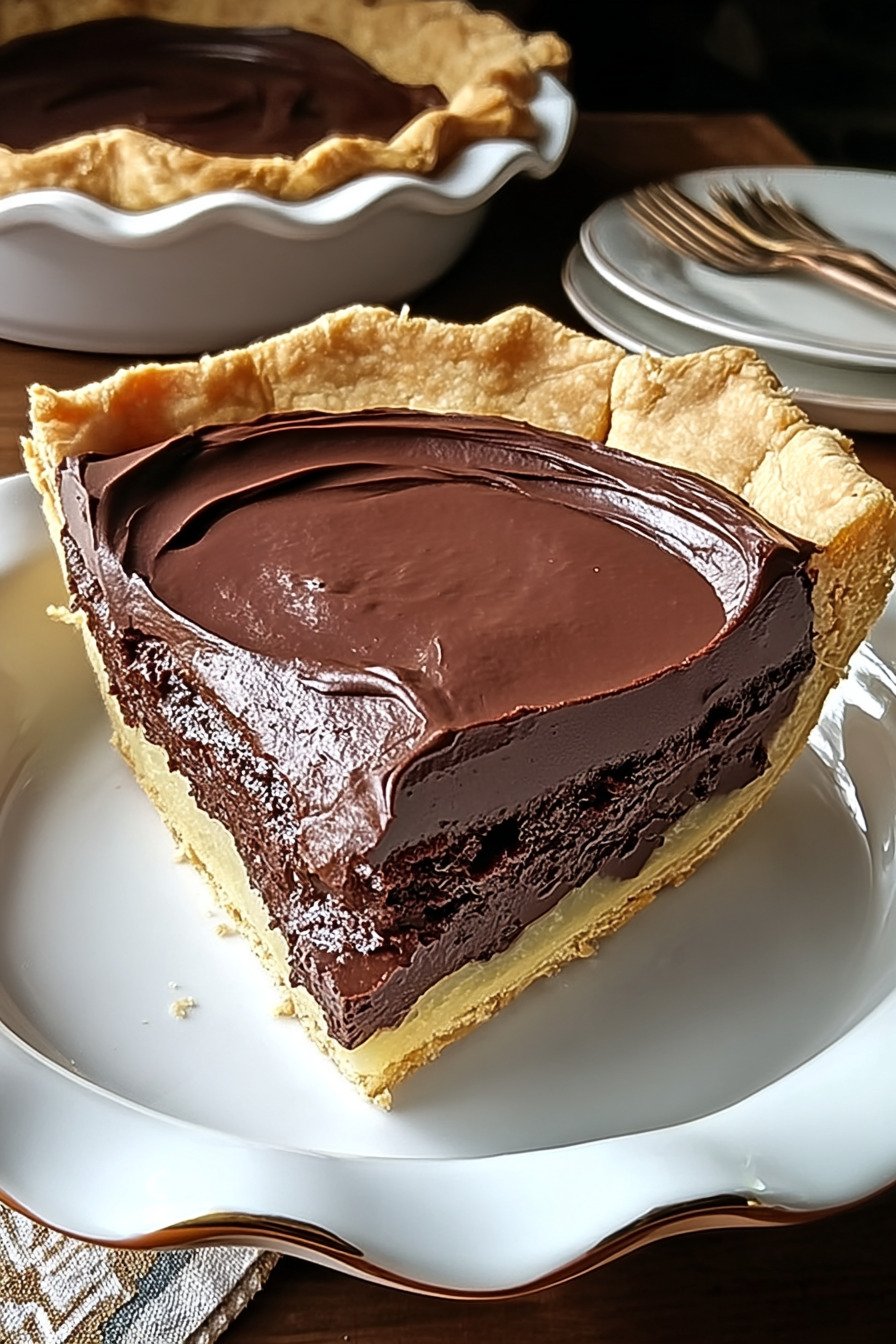
2) Easy Grandma’s Chocolate Cream Pie Recipe
I can’t remember a single holiday without this chocolate cream pie sitting proudly on Grandma’s table. It wasn’t fancy, but somehow, it always stole the show. The filling was thick, smooth, and glossy, with just enough sweetness to make you close your eyes after that first bite. I swear, you could smell the cocoa and butter mingling before it even came out of the fridge. That’s how powerful the aroma was.
What makes this pie stand out from other Pie Filling Recipes is the balance—it’s not cloyingly sweet, nor is it bland. The cocoa brings warmth, the milk makes it lush, and the butter seals the deal. Every bite is like being wrapped in an edible blanket. And honestly, who doesn’t want that?
If you’ve been searching for old fashion chocolate pie recipe ideas that hit right in the heart, this one’s your golden ticket. It’s proof that sometimes, simplicity wins over showy desserts. Just pure, rich, homemade love baked into a crust.
3) Ingredients for Grandma’s Chocolate Cream Pie
Sugar: This sweet foundation balances the bitterness of cocoa. It’s the backbone of every good pie filling recipe, giving that smooth caramel undertone that makes your taste buds happy.
Flour: Helps thicken the filling so it sets beautifully. You don’t need much—just enough to hold that chocolatey goodness together once chilled.
Cocoa Powder: Go for unsweetened cocoa to get that deep, nostalgic flavor Grandma swore by. It’s the reason this pie feels like a warm hug in dessert form.
Milk: Whole milk adds richness and helps everything blend smoothly. It gives the pie its luscious, creamy texture that feels like silk.
Egg Yolks: These add a custard-like depth. Once cooked, they turn the pie into this velvety dream that holds its shape but melts on your tongue.
Butter and Vanilla: Butter adds shine and smoothness, while vanilla rounds out the flavor, giving the pie that cozy homemade aroma you can’t fake.
Pre-baked Pie Shell: You can use store-bought, but homemade makes it feel extra special. It’s the stage where all the pie filling magic happens.
Whipped Cream: The finishing touch. It adds airiness and makes each bite feel lighter, like the sweet finale to a chocolate symphony.
4) How to Make Grandma’s Chocolate Cream Pie
Step 1. Whisk together sugar, flour, cocoa, and salt in a saucepan. This is where the magic starts—dry ingredients becoming the base of something extraordinary.
Step 2. Slowly add milk while whisking. Patience is key. The smoother you blend, the silkier the filling will be.
Step 3. Cook over medium heat until it thickens and bubbles. You’ll know it’s right when your spoon leaves a trail through the mixture.
Step 4. In a small bowl, beat the egg yolks and mix them with a bit of the hot filling to temper. Then pour that back into the saucepan—don’t rush this step, it keeps the eggs from scrambling.
Step 5. Stir in butter and vanilla once it’s thick and smooth. The aroma alone will make you smile.
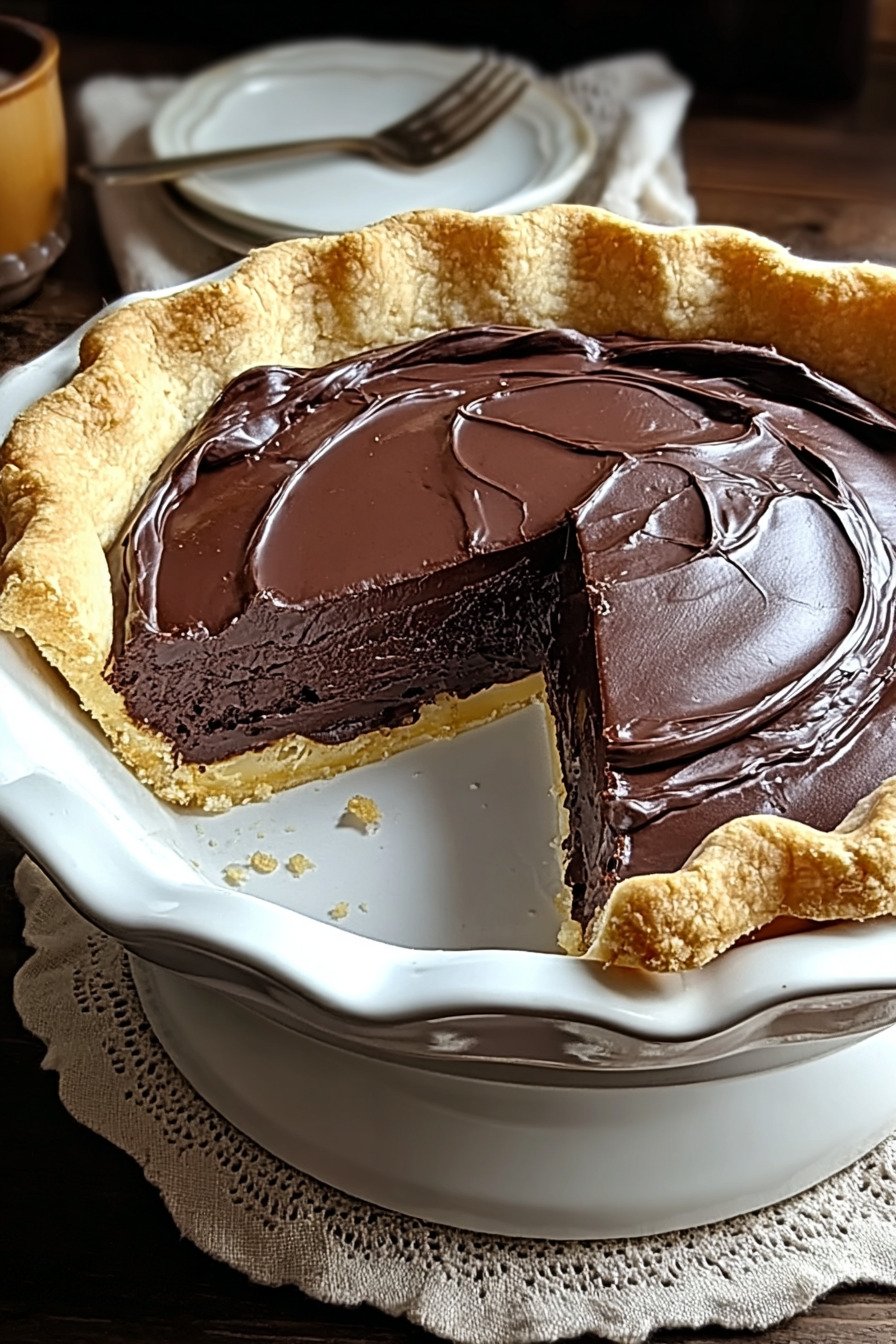
Step 6. Pour the filling into your pre-baked pie crust. Let it cool slightly, then refrigerate for several hours until it sets. Once ready, top with whipped cream, slice, and try not to eat the whole thing in one sitting.
5) Tips for Making Grandma’s Chocolate Cream Pie
Use quality cocoa—it makes a world of difference. I’ve tested a few brands, and the rich ones bring that “wow” flavor you crave from Best Pie Recipes. Don’t skimp on the butter, either. It’s what makes that filling glossy and indulgent.
When cooking, stay patient. Don’t crank the heat to rush it. Letting the mixture thicken slowly gives it that smooth, melt-in-your-mouth texture we’re after. Think of it like watching a good movie—you wouldn’t fast-forward to the end, right?
Finally, always chill the pie fully before slicing. The wait might feel endless, but when you lift that first neat slice, you’ll thank yourself. Cold, silky chocolate filling meeting flaky crust—it’s worth every second.
6) Making Grandma’s Chocolate Cream Pie Ahead of Time
If you’re planning ahead for a party or Sunday lunch, this pie is a lifesaver. Make the filling a day before and store it covered in the fridge. Then pour it into your crust a few hours before serving.
One neat trick I learned from Grandma—press plastic wrap directly on the filling before chilling. It keeps that lovely sheen and prevents any skin from forming on top. No one wants that surprise layer when they’re expecting silky chocolate heaven.
And if you’re serving the next day, top it with whipped cream just before it hits the table. That contrast between the cool, creamy topping and rich chocolate filling? Pure perfection, every time.
7) Storing Leftover Chocolate Cream Pie
Cover leftovers with plastic wrap or store them in an airtight container. Keep them in the fridge for up to four days—but let’s be real, they’ll rarely last that long.
Don’t freeze the pie, though. The texture changes and you lose that smooth, custardy mouthfeel. If you somehow have leftovers (a miracle in itself), grab a fork right from the fridge. Cold chocolate pie has its own charm—it’s like an edible secret you get to enjoy at midnight.
Sharing’s optional, but you might want to hide the last slice if you live with dessert lovers. I’ve learned that the hard way.
8) Try these desserts next!
9) Grandma’s Chocolate Cream Pie
Grandma’s Chocolate Cream Pie – Pie Filling Recipes You’ll Crave
Ingredients
- 1 cup sugar
- 2 tablespoons all-purpose flour
- 3 tablespoons unsweetened cocoa powder
- 1/4 teaspoon salt
- 3 cups whole milk
- 3 egg yolks, beaten
- 1 tablespoon butter
- 1 teaspoon vanilla extract
- 1 pre-baked pie shell
- Whipped cream, for topping
Instructions
- In a medium saucepan, whisk together sugar, flour, cocoa, and salt.
- Gradually whisk in the milk until smooth. Cook over medium heat, whisking constantly, until mixture thickens and starts to bubble.
- Reduce heat and cook for another 2 minutes, still stirring. Remove from heat.
- In a small bowl, beat the egg yolks. Slowly stir in about 1/2 cup of the hot mixture to temper the eggs.
- Pour the egg mixture back into the pan and return to medium heat. Cook and stir for 2 minutes more.
- Remove from heat again and stir in butter and vanilla until smooth.
- Pour filling into the baked pie shell. Let it cool slightly, then refrigerate for at least 4 hours or until set.
- Top with whipped cream before serving. Try not to eat the whole thing yourself.
10) Nutrition
Serving Size: 1 slice | Calories: 385 | Sugar: 36 g | Sodium: 190 mg | Fat: 19 g | Saturated Fat: 11 g | Carbohydrates: 50 g | Fiber: 2 g | Protein: 5 g | Cholesterol: 105 mg


Leave a Comment